# Networking
The last step before proceeding with the configuration of PlexusLAB is the management of the connection to the I/O devices.
Make sure you have at least one I/O device for which you know the IP address before proceeding with the setup via the platform. Each device of the PlexusPOD series offers the possibility to manually set its own IP; refer to the POD user manual for more information on this.
TipIt is good practice to assign a subnet to the section that connects the PlexusLAB web server with the I/O devices, as in the following examples.
More complex networks, in which may appear I/O devices not belonging to the PlexusPODs series, are listed among the advanced examples.
# Basic configuration examples
Below there are some examples of networks made up of a PlexusLAB Web Server and different combinations of connected I/O.
# 1 PlexusPOD
Web Server and PlexusLAB + 1 PlexusPOD.
A simple configuration like this allows you to monitor your system thanks to the inputs and outputs provided by the PlexusPOD.
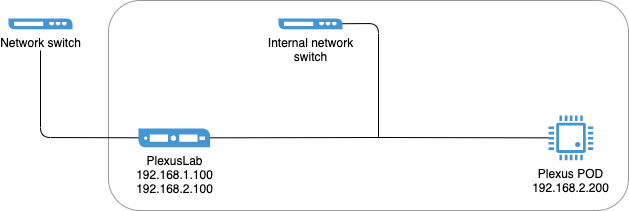
PlexusPOD device's address: 192.168.2.200
# 2 or more PlexusPODs
Web Server with PlexusLAB and 2 (or more) PlexusPODs.
A configuration of this type allows you to extend the number of sensors and actuators connected to the system thanks to the use of more than one PlexusPOD.
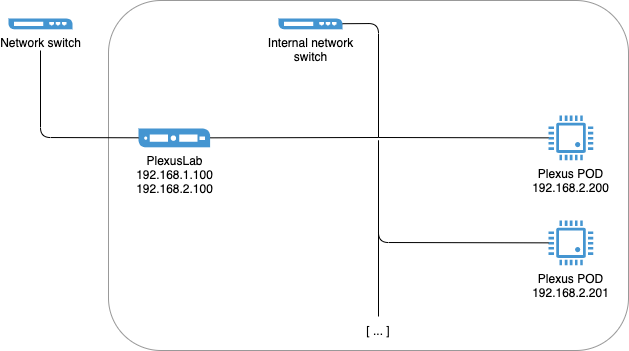
PlexusPOD devices' addresses: 192.168.2.200, 192.168.2.201, ...
# Multi-server configuration examples
Below there are some examples of networks composed by more than one PlexusLAB Web Server and different combinations of connected I/O.
# 2 autonomous PlexusLAB
2 Web Server with PlexusLAB with its associated PODs (as seen before for basic network configurations), without any virtual link between the two.
This is just a basic configuration, replicated on more than one server.
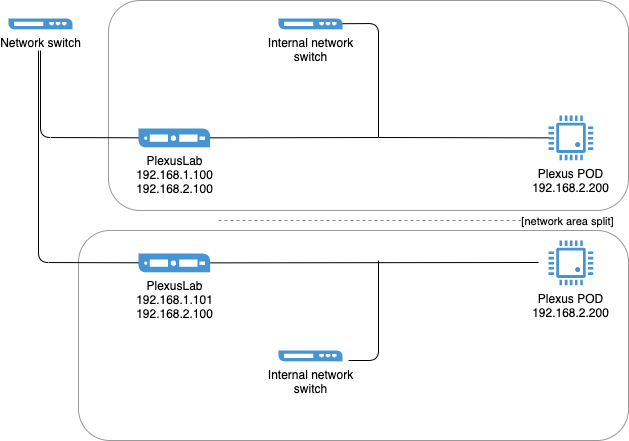
PlexusLAB address 2: 192.168.1.101/plexus/
# 2 PlexusLAB, including 1 bridge
2 Web Server with PlexusLAB, one of which is in Bridge mode, plus the related associated PODs (as seen for the basic network configurations).
A configuration of this type, once the setup on both Web Servers is complete, allows you to monitor the entire system from the PlexusLAB platform installed on the "master" machine.
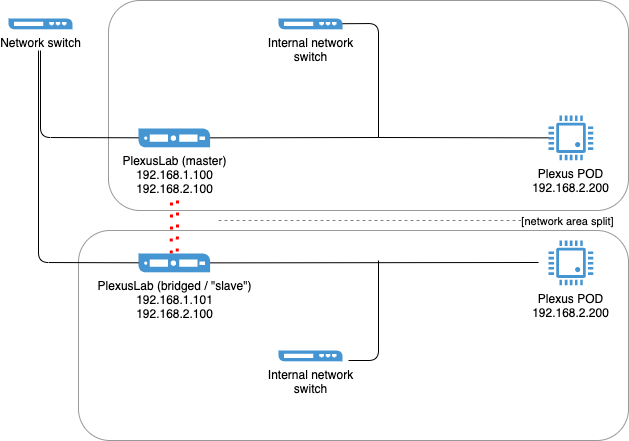
PlexusLAB address 2: 192.168.1.101/plexus/