# Sections
This page manages the sections that holds variables and timers that are able to connect to the respective device channel. It's suggested to create different sections in order to collect variables and timers depending on their meaning and purpose. "Sections" page provides interface that allows adding / deleting variables respective to each sections that you created.
It is possible to use variables and timers inside funtcions. If you want to know more about it, visit API functions page.
# Topbar
Two icons define the Topbar:
| Icon | Name | Information |
|---|---|---|
| search | Search | Search through Functions, Blackbox and Panels the name of the specified variable |
| info_outline | Info | Allows to modify section name or to delete it |
# Side panel
The configured section are listed on the left, with their name. The icon and the label take on color
- blue, to identify the sections currently selected and displayed in the view;
- grey, to identify other sections
# Add a section
Adding a new section is done by clicking on the button labeled "ADD SECTION" and setting a name, which must comply with the Plexus nomenclature criteria;
# Re-ordering the sections
It is done by clicking on the "Edit Order" button at the bottom of the section list; note that the button is shown only when there are at least 2 sections configured.
When clicked, a modal window is displayed that allows you to drag the rows and, if necessary, save the new order in order to see the list with the desired structure.
# View
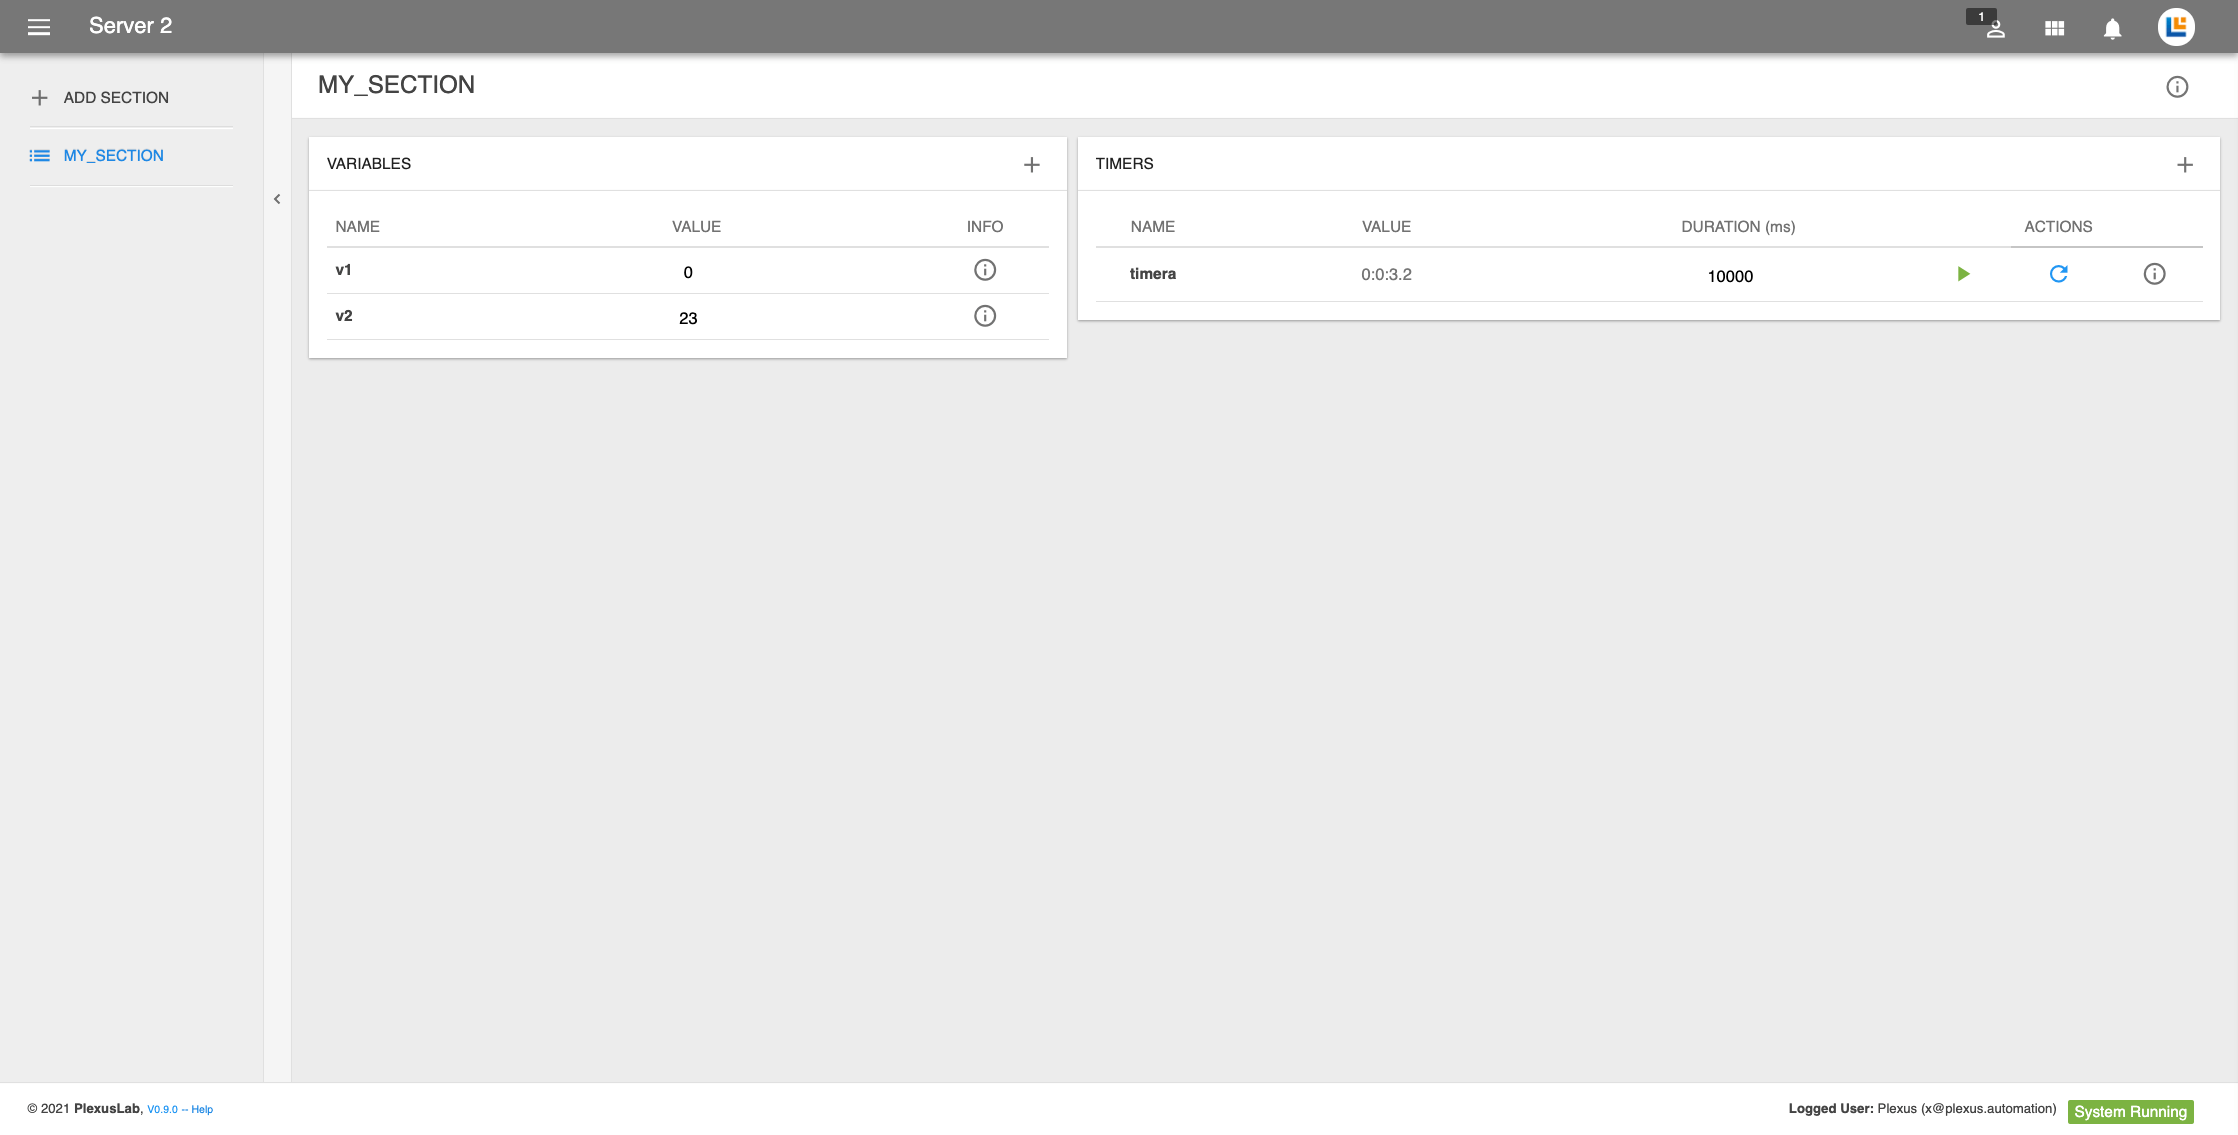
Sections Main Panel is split into two columns. One for adding variables another for adding timers.

# Variable
Variables allow to keep in memory the current state of the system. Adding a new variable is done by clicking on the '+' button and defining a name, which must comply with the Plexus nomenclature criteria.
# Editing Variable
Editing a variable is done by clicking on the info button, which opens a modal with the following elements
- Name;
- Min, The minimum value the variable can down up to;
- Max, The maximum value the variable can go up to;
- Dec, The decimal value the variable round up to
# Timers
Timers introduce the possibilty of timing the events. Adding a new timer is done by clicking on the '+' button and setting a name, which must comply with the Plexus nomenclature criteria.
Once a timer is added, you can set a DURATION. The VALUE field keeps track of time spent since timer was started; a 0 value means that the timer never started or it just stopped.
To rename or delete a timere, click on the info button info_outline.
# Using Timers
The "ACTION" buttons allow to take control on timer status. They are made with different icons and colours
| Icon | Status | Corresponding action |
|---|---|---|
| power_settings_new | Stopped and resetted | Timer starts counting |
| power_settings_new | Stopped | No effect: need a reset in order to start again |
| pause | Started | Timer is paused |
| play_arrow | Paused | Timer start from where it stopped |
| restart_alt | Stopped and resetted | No effect |
| restart_alt | All other cases | Timer is resetted |